Unity Mecanim Animation Tutorial: Difference between revisions
No edit summary |
No edit summary |
||
| Line 15: | Line 15: | ||
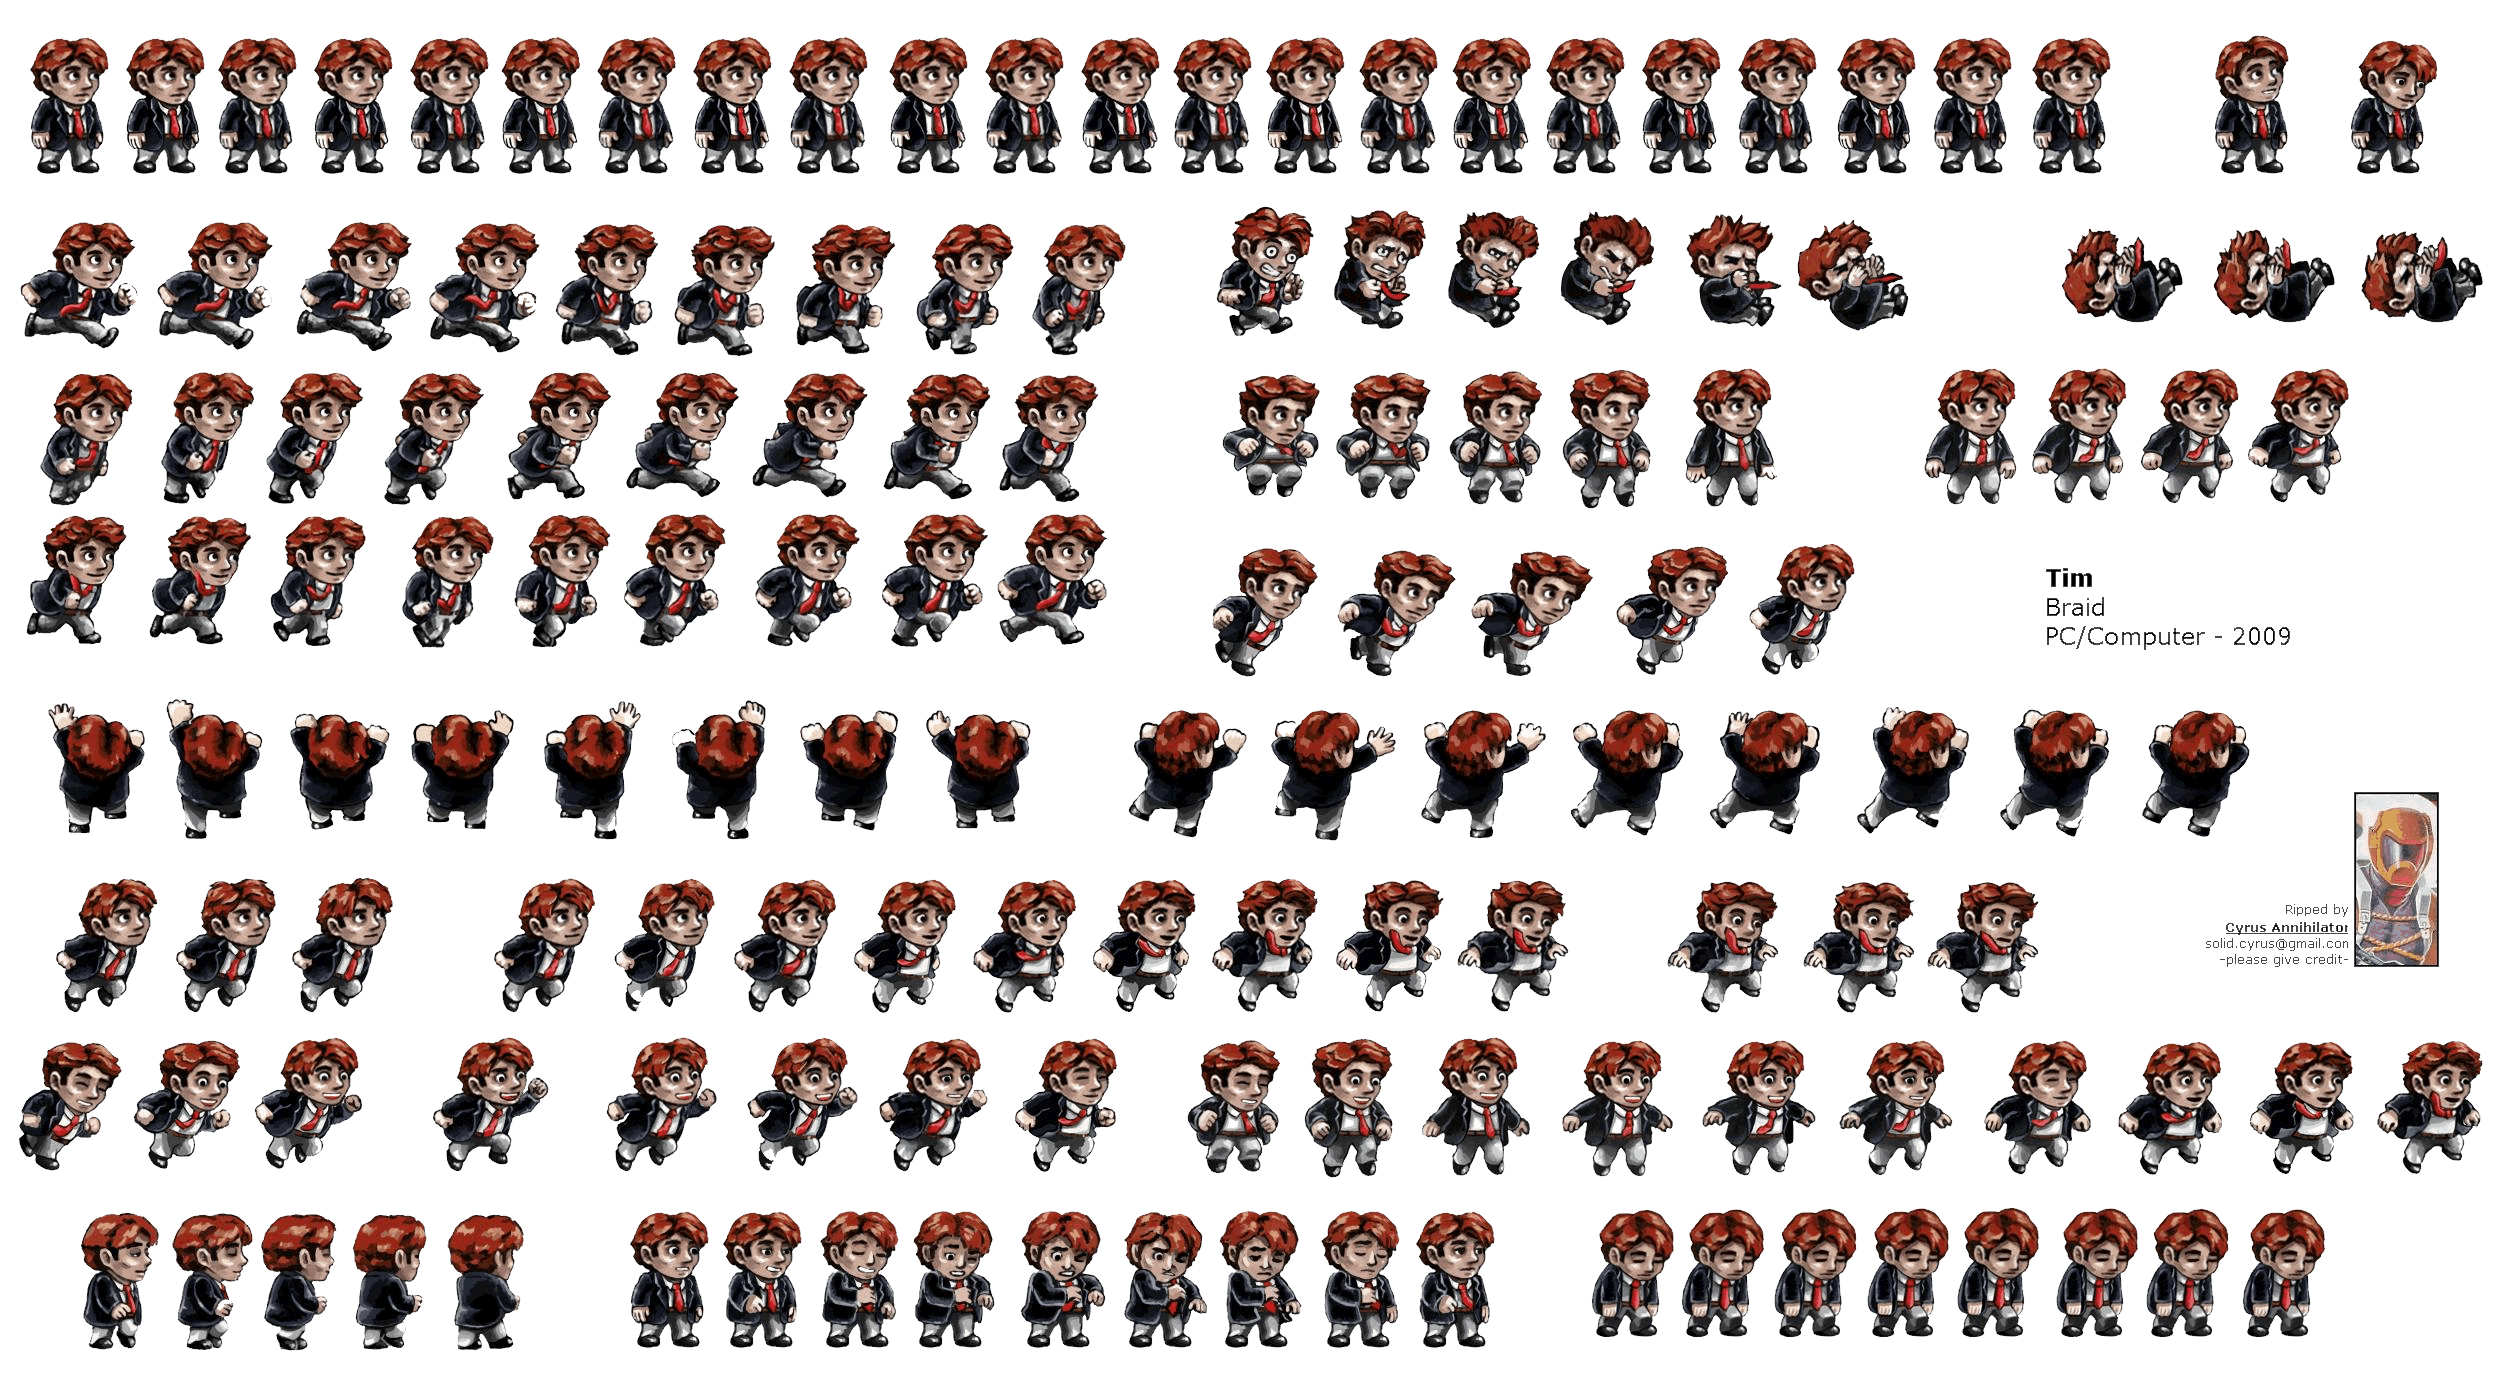
Grab your favorite character sprite sheet, preferably with walking, running, and jumping and falling, and climbing sprites. Here's a good one: | Grab your favorite character sprite sheet, preferably with walking, running, and jumping and falling, and climbing sprites. Here's a good one: | ||
https://noisebridge.net/images/e/ea/Tim.png | |||
And why not grab an enemy, to boot: | And why not grab an enemy, to boot: | ||
Revision as of 21:48, 22 March 2016
General Fun Animation Stuff
http://finalbossblues.com/walk-cycles-p1/
https://www.youtube.com/playlist?list=PLvFQJa1XAXzx0ABskDtl8FwIOMrrPuIOR
2D
Setup
Grab your favorite character sprite sheet, preferably with walking, running, and jumping and falling, and climbing sprites. Here's a good one:
https://noisebridge.net/images/e/ea/Tim.png
And why not grab an enemy, to boot:
http://i.imgur.com/0zz2RQG.png
Create a New Unity Project with 2D Assets Package
Main Camera – Set Orthographic, Size 5 Set Scene to 2D mode Create two platform objects to interact with (use prefabs from assets/standard/2d/prefabs
-import player character sprite into assets folder
-edit sprite to correct settings and split by auto or grid, depending on arrangement (tim image is auto)
--sprite 2d and ui, multiple, 100 pixels per unit for Tim sprite
Create empty character object
- add sprite renderer
- add rigidbody 2d, check 'z' next to 'freeze rotation'
- add animator component
- add colliders (box 2d for body, circle 2d for feet area)
- add animator component
Create animator controller
- right click in assets folder → create → animator controller
- attach to animator component on character
- relationship: game object 'has a' animator 'has a' animator controller
- open animations window
- window → animation, or ctrl+6
Create idle animation
- have character object selected
- click “create” in animation window
- new folder, call it “Animations”, name file 'idle'
- inspect animator window to verify new animation state exists
- go to animation window again, shift click to select all idle frames(0-21 for Tim) from sprite, drag into animation window. Set samples appropriately. Samples are thought of as 'frames per second' for a specific animation. For Tim *sprite idle animation, 18 is good
- click play and see it in action!
Create Run animation
- select character, go to animation window, animation name drop-down → create new clip → name it 'run'
- ctrl/shift click to select run frames, drag into animation window (for Tim, it is sprites 42-50, 60-68, and lastly 24-32, in that order)
- to see animation in action: right click 'run' state in animator controller window → set as layer default
Animator Controllers are State Machines
https://en.wikipedia.org/wiki/Finite-state_machine
So, for all interactions we want, we need to define transitions between each relevant animation 'state'. To do this, we use 'parameters', or variables within the animator controller.
Walk → Run transition
- create new parameter: click '+' next to parameters → float → name it “Speed”
- right click 'idle' state → make transition → click 'run' state
- click 'idle' state to view its info in inspector, click idle->run under 'transitions'
- uncheck 'has exit time'
- under 'conditions', click '+' to add a check for speed being greater than 0.01
- (the value for Speed will be changed in a script)
Scripting
- Assets, right click → create folder → name it 'Scripts'
- right click → create → c# script → name it 'CharacterController'
- add the following to the body of the character controller class:
<source lang="csharp"> public float maxSpeed = 8f; public bool facingRight = true;
// Use this for initialization void Start () { } // Update is called once per frame void FixedUpdate () { float move = Input.GetAxis ("Horizontal"); GetComponent<Rigidbody2D>().velocity = new Vector2 (move * maxSpeed, GetComponent<Rigidbody2D>().velocity.y);
if (move > 0 && !facingRight) Flip (); else if (move < 0 && facingRight) Flip (); }
void Flip(){ facingRight = !facingRight; Vector3 theScale = transform.localScale; theScale.x *= -1; transform.localScale = theScale; } </source>
- this effectively moves our character around back and forth, given proper input
- play game to see if desired
- animator code:
- at Class level:
<source lang="csharp">public Animator anim; </source>
- in Start():
<source lang="csharp">anim = GetComponent<Animator> (); </source>
- in FixedUpdate() :
<source lang="csharp"> /* AFTER Input.GetAxis() is called */ anim.SetFloat ("Speed", Mathf.Abs (move)); </source>
- Play game to see transition triggered!
- However, it DOESN'T trigger back to idle! (Not to worry!)
Run → Idle Animation Transition
- right click 'run' state → make transition → click 'idle' state
- under 'conditions' in transition inspector, click '+' to add a check for speed being less than 0.01
- uncheck 'has exit time'
- settings → transition duration: 0
Group Exercise: Climbing!
As a group, animate a character climbing up (and down!?) a 'ladder' or other climbable object.
Hints/ Otherwise Useful Info to get started: <source lang="csharp"> /* use this to determine if we are on something climbable */ public LayerMask climbable; /* use a Unity Object to check collision with 'climbable' objects*/ public transform climbCheck; </source>
Jumping and Falling Animation
Preparing to create a dynamic animation that plays whenever our character is not on the ground
Class level code:
<source lang="csharp"> public bool grounded = false; public Transform groundCheck; float groundRadius = .2f; public LayerMask whatIsGround; public float jumpforce = 500f; </source>
The Logic. In FixedUpdate() method:
<source lang="csharp"> grounded = Physics2D.OverlapCircle (groundCheck, groundRadius, whatIsGround); anim.SetBool ("Ground", grounded); </source>
Back In Unity
- Create GroundCheck object, nested under character object, place transform at character's feet
- Create "Ground" Layer from layer's dropdown in top-right of inspector
- Assign ground objects to that layer
- Click Character and in CharacterController component dropdown list for 'whatIsGround', select ground layer
- Create 'Ground' Bool in Animator
Jumping Code. In FixedUpdate():
<source lang="csharp"> anim.SetFloat("vSpeed", rigidBody2D.velocity.y); </source>
In Update():
<source lang="csharp"> if (Input.GetKeyDown (KeyCode.Space) && grounded) { anim.SetBool ("Ground", false); GetComponent<Rigidbody2D>().AddForce (new Vector2 (0, jumpforce)); } </source>
Blend Trees
- select character object and create 12 jump animations named jump1, jump2, ...jump12
- evenly spread sprite frames across the 12 animations created, one frame per animation
- in effect, we are creating 12 'mini-animations'
- In Animator:
- create parameter for vSpeed
- delete 12 jump animation states
- right click → create new state → from new blend tree, rename to 'jumpandfall'
- transition from any state to blend tree when ground = false
- transition from blend tree to idle when ground = true
- double click blend tree
- blend type -> 1d
- parameter -> vSpeed
- 'add motion field' x 12
- drag 12 animations from project folder into each motion field
- uncheck 'automate threshold'
- minimum -13, maximum 5
- starting near minimum value, change each threshold as you see fit to gradually transition through each stage of vertical speed (a parabolic fashion usually looks nice)
create numbered jump “animations”
place in appropriate sprites
3D
Also Coming Soon!
Setup